Wednesday, April 24, 2013

Pinterest Experiment II: Mobile Device Customization


image

Okay, so not exactly, because the thing I saw was for Apple products, and used some app that I didn't really feel a need to download, even if it was available as an Android app. Which isn't likely, being that there are a lot of app designers who only produce cool apps for the Apple market. And, yes, I am now whining.

But, regardless, the pin got me thinking, "What if I could figure out a way to make my tablet a little more, well, mine?" Much as I love Android, admittedly the wallpapers that come on the device are not the spunky, sweet, charming, bright, sunshiny, colorful backgrounds this Polly wants on her home screen.
And this is how I got started. As a potentially important note, the following instructions are for use within the Android Pinterest app, available through Google Play (Android's app system, if you are a Apple nerd or don't know much about Android). You should read through them, but there are instructions following on doing the same thing through your Chrome browser.


From Pinterest:

In the Pinterest 'Design' category board, I'll often run across really cute pictures of textiles or scrapbook paper. So, if you find one of these you absolutely love, tap the pin. In the lower right-hand corner, you will see a settings button, and when you two it, select the option "save to device".
When your notification bar in the upper left-hand corner says that the image is saved, go to your photo gallery. (At this point, I should mention that there is a possibility some of these buttons and photo galleries may be set up differently between tablets and phones, so if you have an Android phone, play around with it, and let me know through your comments how you did it.) In your photo gallery, at least on my device, will be an album labeled "Pins". Just as long it's in one of your albums, we're good. If you need to crop a measuring tape out or would like to change anything with the small photo-editing software on your device, now's the time to do it. Then, navigate to your home page, tap and hold until the option to select wallpaper from gallery, live wallpapers, or normal wallpapers appears, tap "From Gallery", find your saved pin, and select it.
Now, it will ask you to define where you want it to crop. Crop it as large as you can, because, particularly in tablets, the pictures may not be very high quality, so the smaller your cropped image, the more pixelated your background. Hit "OK", and enjoy your new home page!


From the Web:

If you have a picture in Chrome you would like to save to your device, click on the image. It should either open a window of the picture behind which you will see the original web page, or continue to the page it's hosted on. In any case, tap and hold the picture, select "save to device", and proceed as above.

{There is a possibility that some images may be under copyright, so please don't print the image out for any reason, and if there is a watermark on the picture, either leave it in your cropped background, or don't use it at all. We all love to share, but there are men and women making a livelihood off their photography or paper, and it is our responsibility to be sure we are honoring their work.}

Well, I had fun playing around! I hope you have found another cool thing to do with your techno-gadget that will brighten your day.

Pinterest Experiment I: Almond Bread


Almond bread? It sounds a little weird, maybe, but it was a recipe I found on Pinterest today, and I decided to try it.

{For those others of you on Pinterest, I tend to be one of those pinners who pin things, but don't try them. I have decided to try to fix that, and this is the first experiment of however-many-i-do.}

The link to the original recipe is here.

{For those of you who may be gluten-free, this recipe would be a super easy one to amend by exchanging the wheat flour with almond and coconut flours. Really, I'm sure you could use whatever gluten-free flour mix you wanted, these flours are just preferred as far as I'm concerned because I have reactions to white rice}

But, before we go any further, allow me to say that I edited the recipe quite a bit, so this is not one of those "Pinstrosity" kind of posts, you know, those wonderful cooks who test the recipes, and post about how bad a recipe it was so the world will avoid it at all costs. I was just trying it, and thought I would blog it while I was at it.

The changes made were, most notably, no poppy seeds. I love poppy seeds, but they don't usually live in my cabinets, so I couldn't bring them to the party. Or, more simply, I didn't have any, so I didn't use any. Also, we had hardly any oil, so I only used 3/4 cup oil instead of 1 1/8 cups, and it was half olive oil, and half coconut oil, instead of vegetable cooking oil. I didn't foresee this being a problem, because there's so much milk in it, and I used whole milk, so there was more fat from there, and instead of fake butter flavoring, I used real butter, which is healthier, anyway.  I wish I could have reduced the sugar, because it needs 2 1/4 cups, which seems like way to much for two loaves, but I did not mess with that because I felt like I had pushed my luck already. I also didn't drizzle it, mainly because I don't have orange juice, so as far as the orange glaze goes, "I know nussingk!" :-)

Well, it was very moist, but both loaves seemed a little dense, and while I absolutely love almond flavoring, having it in something so bready was a little weird. The flavor was fine, it just took some getting used to the taste with that texture. I was going to eat it the way I do lemon poppy seed bread, plain with no butter, but the somewhat "sharp" taste of the almond extract needed the softening of some butter. I think the glaze is what would make this dessert bread phenomenal. I'm not going to toss the recipe, pulling it down from my virtual corkboard, but if I try again, serving it with some ice cream or some other complimentary dessert item would be better. As a final note, it may just be my circa 1950 electric oven, but I had to bake these loaves for about 80 minutes, which is 20-30 minutes longer than the recipe calls for. Do what you like with that info, but there it is. :-)

My PollyPinRating is 4 out of 5. My edits to the recipe may have done it no favors, but it was just a tad dense, and without some other flavors balancing the almond, the taste buds get a little weary of the flavor. The amount of unhealthy ingredients in the recipe also goes into this number; namely white sugar and cooking oil.

Follow me on Pinterest: http://pinterest.com/pollypeabee/ ♥

The Violinist's Vacuum


Yes, you read that right.  This is what happens when you start teaching something.  Things start popping up as pedagogy tools all over the place.

When you're teaching violin, pencils are used to teach proper bow technique, balls are placed to help keep the correct distance between your palm and the neck of your instrument, and popsicle sticks with Velcro straps force a beginner student to keep the right wrist position.  But I'm guessing that few teachers implement vacuums.  While my student cannot afford such an expensive pedagogical tool, I delight in sharing with you the ideal vacuum for instructing your violin pupil in proper bow hand fluidity.

The "Shark Navigator Lift-Away Professional Vacuum - Model NV356".

Now.  Why is it that I would highly recommend this vacuum to violinists of all ages and abilities?  Because of its swivel head feature.

This vacuum is steered by rotating the handle.  This means (drumroll, please) that you can vacuum your room simply by turning the wrist.  You can turn it the way you turn most vacuums, too, but for violinists, the ability to rotate your wrist independent of your elbow and shoulder is crucial to good form.  Another plus is that it also puts little to no strain on the muscles between your individual arm joints (shoulder to elbow, elbow to wrist).

Violinists, particularly fiddlers, need their arms to be as relaxed as possible in playing.  Training one's arm to remain in a root position from the shoulder to elbow allows the elbow and wrist to do their thing.  One thing, perhaps the thing, that violinists need to look out for is tightness in their joints, and the absence of fluid motion.  Tight muscles lead to fatigue, and even bad circulation by cutting of blood supply.  This vacuum, if used with its swivel head feature, would help fiddlers and classical players alike reinforce that circular wrist action so necessary for good form--in a common, everyday, extra-practicing section of our time.  And for those of my readers who don't play this awesome instrument, I would say two things:

- Number One -
Consider picking it up.  Hah!  You probably felt that coming.

- Number Two -
I would still get this vacuum.  The swivel head feature reduces strain on the joints and muscles that everyone could benefit from.  Relaxed form is crucial not just to musicians but all people who want to live an ache-free life.
Yes.  *sigh*.  Who knew musicians and vacuuming could be such good buddies? ♥

Knitting: English vs. Continental


If I were to pick one question I like to ask fellow or beginning crafters (and I do, quite frequently), that question would be, "which way do you knit?"
Now, this tends to be dangerous ground.  This is the Republican vs. Democrat, Lutheran vs. Calvinist, Union vs. Confederate argument of the knitting world.  Everybody has their different way, and this is mine:

I knit continental.  I learned to knit English back when I was maybe 6 or 7 from my Granny, and did not stick with it.  I lost the knack, and when I decided to pick it up again, I just couldn't get my fingers to work that way.  My mom and I went online and watched knitting videos, and decided to try the continental way.  We figured it out, and that's the way I've done it since.

One thing several people have observed to me is that continental knitting and crocheting are very similar.  The yarn goes over your left hand.

The other thing to observe is that when reading, we are taught to go from left to right.  When knitting continental, your yarn is on your left, and you are working the yarn to your right.  It is, for me, a very natural flow of things.

English, however, is the style of knitting you are more likely to be taught if you learn from your grandmother.  It is the older style, and thus the more established form.  Asking an older woman to knit continental would be like asking a Italian to read Spanish.  They might be able to do it, but it isn't as comfortable, and that's fine, that's what they are accustomed to.

For those who are beginners, though, perhaps continental is the way to go.  I bear no ill will those who knit differently than I, but found that continental was helpful to me, and wanted to make sure I afforded those who are interested in learning the same opportunity. ♥

A Button


Here's the HTML:
<p style="text-align: center;"><a href="http://pollywollydesigns.wordpress.com"><img title="button2011" src="http://pollywollydesigns.files.wordpress.com/2010/11/button20111.jpg" alt="" width="158" height="200" /></a></p><p style="text-align: center;">&nbsp;</p>

Catty


"With subtle hostility in an effort to annoy."
Over the last few years, I've learned to LOVE to knit.  I learned to knit when I was very small, but never enjoyed it until recently.  I kind of go through stages, knitting different things in large numbers at different times, and last year, it was the:
See-How-Many-Silly-Cat-Collars-You-Can-Get-Your-Patient-Kitty-To-Wear year.
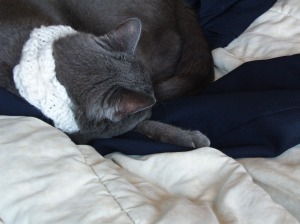
Yep, I turned out some interesting ones.  Like the "Shakespeare Collar".
Looking at it from the front, it was poofy-like, and it reminded me of a stiff collar from the days of Shakespeare.  A first attempt, it didn't go quite as expected, as you can see in the image, the seam is very much wonky.  Then I tried the "Masculine Tie":
Notice the sleeping head with the chin resting on the paws.  This is the ideal position for a kitty model.  This way, they can't scratch you when you repeatedly disgrace them with such rampant mockeries. :D
Next: Professional Button-Up.
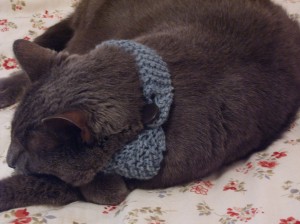
A bit over-the-top?  Maybe.  But I was on a roll.  Presenting the Sailor PomPom Collar:
Awww.  No, I think he was actually a bit mad in this shot.  He was getting tired of wearing knit things around his neck.  But, alas, I am bigger than him.  I made another one like this in blue and brown, which was much cuter, but (and how this happened, don't ask me) I don't have an image of him wearing it!
The phase is now over, but my pussy does still every once in a while "deal" with wearing one of these creations.  Was I crazy?  Was I being catty? Pretty much.
Just ask the feline. ♥

Ami-what?


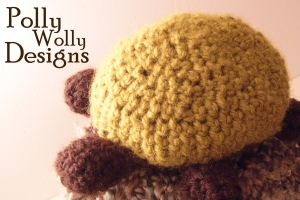
Amigurumi:
"The Japanese art of knitting or crocheting small stuffed animals and anthropomorphic creatures. The word is derived from a combination of the Japanese words ami, meaning crocheted or knitted, and nuigurumi, meaning "stuffed doll."
Or, in this case, a turtle:
Yep. ♥

Crocheted Rug


After spending almost a week camping at a historical resort, where I saw this cool rug, I was itching to try it myself.
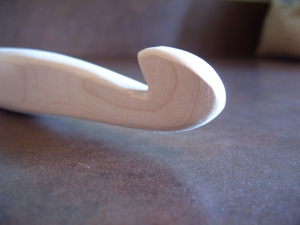
However, I didn't have a crochet hook large enough, nor did I have any fabric strips, being that our family is getting ready to move, and most of our stuff is in storage.  Well, I come downstairs one day, and my brother Bub reveals this:
Yes.  A maple crochet hook that he whittled (with a bit of help from my dad and his buddy) himself.  Whoo Hoo!  Happy Dance!
Of course, I was now itchy to get fabric to rip into strips, so dear Dad brought me to the local thrift store to buy me a sheet or two.  I commenced, and continued until I ran out of strips.  So, right now, it looks like a placemat:
I can't wait to keep going, and to see how big I can get the rug.  But, for now, with school starting back up, it's an imaginary place mat. ♥

Natural Dyeing with Black Chokeberries (Aronia)


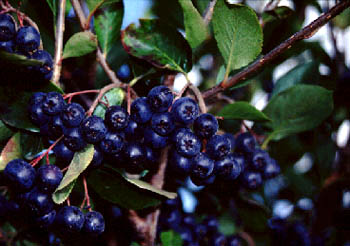
The other day, our family went walking to a Chicago Park District Boat Landing on the Chicago River.  We found bushes and bushes of these:
The Black Chokeberry, or Aronia, turns black in the fall, when it becomes ripe.  We picked some not knowing what they were, or when they became ripe.  As it turned out, they weren't quite ripe.  So, after making Aronia Syrup, (trying to make) Aronia Jelly, and many smoothies with Aronia berries (which are very high in anti-oxidants) we decided to attempt another use--dyeing with them.
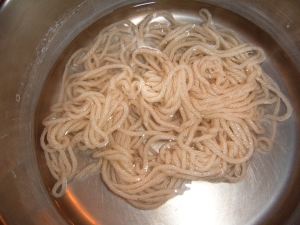
First, you want to simmer the fiber (cottons, silks, or wools) in a 1 to 16 parts salt and water solution for an hour.
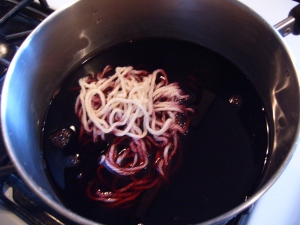
Meanwhile, I would simmer your berries in water (1 part berry to 2 parts water) for about an hour, as well.  When the fiber is ready, drain and rinse it.  When the berries are done, strain them out, and keep the syrupy stuff (the dye) simmering.  Then, put the fiber into the dye:
Simmer in the dye for anywhere between 30 minutes and a few hours.  I chose to dye it for only 30 minutes, but depending on what color you want, you can do it for less or more.
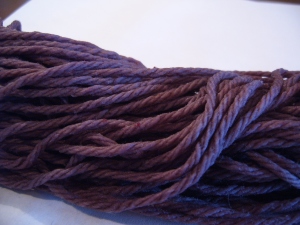
After it is done simmering in the dye bath pull it out with tongs (so your fingers don't look like those of an alien). The color it looks like now, in the case of the Aronia berries, raspberry red, is not what it will look like after you have rinsed it until the water runs clear.
To dry it, I hung it over our shower rod in such a way where the yarn wasn't crossing itself.  When it was dry, I wrapped it around a cardboard tube:
It was a lot of fun, and a learning experience.  If you are interested in dyeing naturally, this website might be a huge help to you: PioneerThinking.com. ♥

01 09 10